DIGITAL PRODUCTIVITY: PRESENTATIONS

DIGITAL PRODUCTIVITY: PRESENTATIONS


|
||||||||||||||||||||
 |
| To open a new blank presentation | |
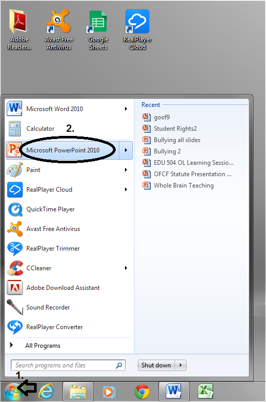 |
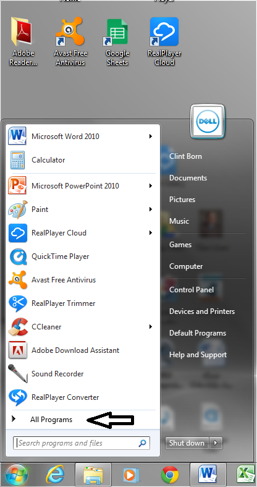
1. Click the Start button on the bottom left of the screen. 2. Move the cursor to Microsoft PowerPoint 2010 and click. Or
|
|
 |
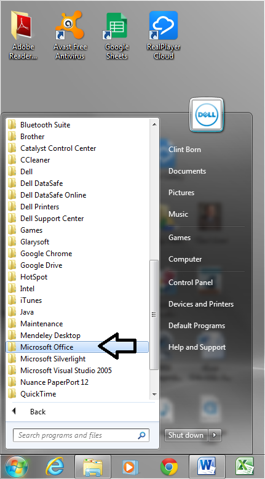 |
2. Then from All Programs, go to Microsoft Office. |
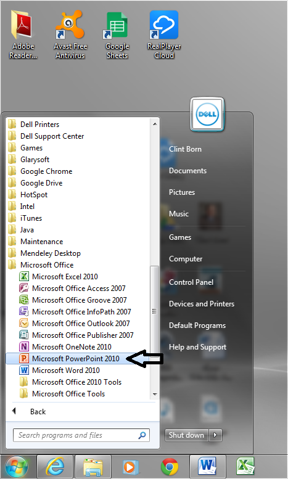
| 3. From Microsoft Office, go to Microsoft PowerPoint 2010
4. Click on PowerPoint and the software application will open. |
 |
| To start a new blank presentation |
| After you have opened the PowerPoint application, you will see the ribbon, the first type of slide layout (Title Slide) and other slide layout types. |
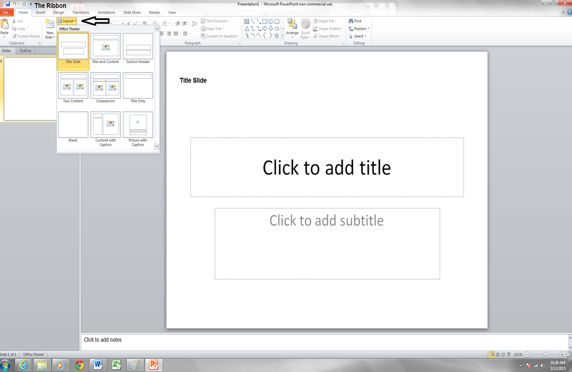 |
Click on the link to watch a video on "Creating a Presentation in PowerPoint 2010" or click on the video.
Slide Layout and a Slide Design Theme
| To open a new blank presentation | |
| The slide layout permits you to put words and images (picture and clip art) on a slide. Each slide layout type (Title Slide, Title and Content, and Picture with Caption) has the slide already arranged in a certain way |
|
To add a new slide 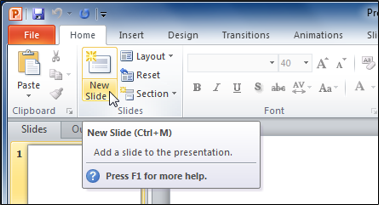 |
2. Select the slide type you want to add from the slide layout choices, and click on it. 3. A new slide is added to your presentation. |
Click on the link to watch a video on "Using Slides" or click on the video.
| To add a slide design theme | |
|
|
| Many PowerPoint slideshows use a slide design theme. A slide design theme coordinates your PowerPoint presentation with colors, graphics, and fonts that all work together to create a consistency for your presentation. | |
| 1. Click slide design on the ribbon.
2. Click the design choice you want, and all the slides will have the same colors, fonts, and backgrounds. |
|
Activity:
 1. Click the picture on the right to open the PowerPoint presentation, "A Slideshow about Me!"
2. Add a new slide inserting the slide type Picture with the Caption Slide. To make changes, you must always be in Normal View.
3. Change the Slide Design Theme.
4. Save the presentation with these changes. You may need to talk to your parents or teacher about how to do this. Or, go to the Unit Wrap-up: Save and Print to learn how to save a presentation.
Words in Slides
To add, delete, select, copy and paste, cut and paste, or add bullet points, you need to know a few basics.
| To add words | |
1. Click in the textbox where you want to add words. 2. The insertion point appears. |
|
|
3. Type directly into the textbox. |
| To delete words | |
| 1. Place the insertion point next to the words you want to delete. 2. Press the Backspace key on your keyboard to delete text to the left of the insertion point. 3. Press the Delete key on your keyboard to delete words to the right of the insertion point. |
|
| To select words | |
1. Place the insertion point next to the words you want to select. 2. Left click the mouse button. While holding the button down, drag the mouse over the words. 3. Release the mouse. The words will be selected. A highlighted box will appear over the selected words.
|
|
| To copy and paste words | |
|
1. Select the words you want to copy. 2. Click the Copy command on the Home tab.
|
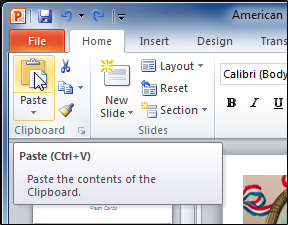
3. Place your insertion point where you want the text to appear. 4. Click the Paste command on the Home tab. The text will appear. |
 |
| To cut and paste words | |
|
|
| To add bullet points | |
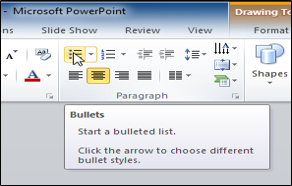
| 1. Select the textbox or specific text you want to format as a bulleted list. 2. Click the bullets command in the Paragraph group on the Home tab. |
 |
|
3. A bulleted list will appear. |
Click on the link to watch a video on "Adding Text in PowerPoint 2010" or click on the video.
1. Click the picture to open the PowerPoint presentation, "A Slideshow about Me!"
2. Delete words "John Doe" on Slide 1.4. Now, copy your name from Slide 1 and paste your name in the "Click to add title textbox" on Slide 2.
5. Save the presentation with these changes. You may need to talk to your parents or teacher about how to do this. Or, go to Unit Wrap Up to learn how to save a presentation.
| Your presentation will be more interesting and exciting if you add pictures and clip art to them. Images also help you better communicate your ideas to your audience. Many of the ways to insert pictures and clip art are the same as you learned in Unit 13 on Images. | 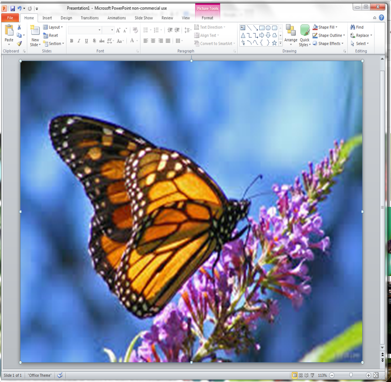 |
| To insert a picture from a file | |
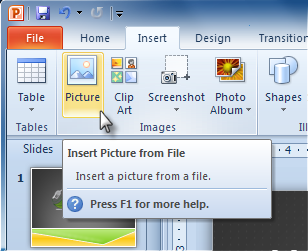 |
1. Select the Insert tab with the presentation open. 2. Click the Picture command and then the Insert Picture from File appears. |
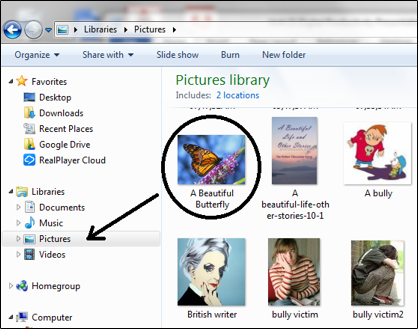
3. Your Picture library appears. 4. Select the picture you want and then click Insert. |
 |
|
5. After clicking insert, the picture appears in your slide. |
| To locate and add clip art | |
| 1. Select the Insert tab with the presentation open.
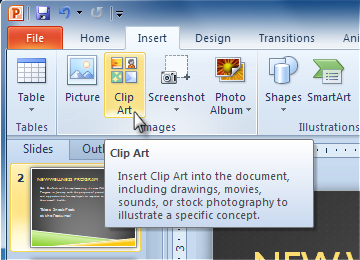
2. Click the Clip Art command. |
 |
|
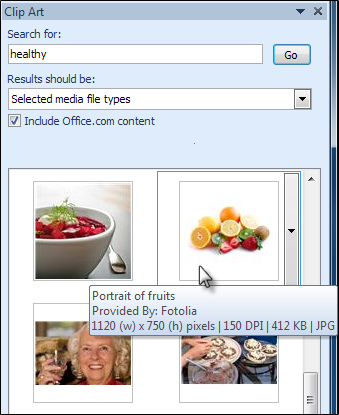
3. The clip art options appear in the window to the right of the PowerPoint. 4. Enter keywords in the Search for: box related to the picture you want to add like "healthy" in the illustration. 5. Click the drop-down arrow in the Results should be: box. 6. Deselect any media types you do not want to see. |
| 7. Look at the clip art from the search.
8. Click on the clip art you want and then click Insert. |
 |
 |
9. The clip art appears in your slide. |
Click on the link to watch a video on "Adding Pictures and Clip Art in PowerPoint 2010" or click on the video.
| To resize and move a picture or clip art | |
|
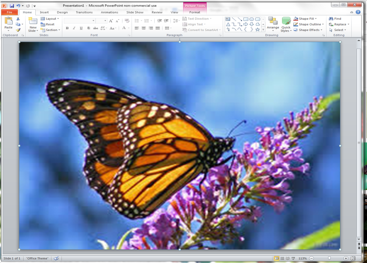
1. After the picture appears, you may want to make it bigger, small, or move it. Then, click on the picture or clip art.
2. Position your mouse over any one of the circles at the corners. The cursor will become a pair of directional arrows |
| 3. Click on a circle and stretch
the picture to the size you
want.
4. To move a picture, place the cursor over the picture and click on it. 5. Drag the picture to the new location.
|
 |
Click on the link to watch a video on "Formatting Pictures in PowerPoint 2010" or click on the video.
1. Click on the picture to open the PowerPoint presentation, "A Slideshow about Me!"
2. Insert in Slide 2 a picture of yourself from your files that you have in your Picture Gallery.
Wrap-up: Save and Print
When you make changes to a PowerPoint presentation or create a new one, you will need to know how to save it in order to make changes to it later. PowerPoint allows you to save your presentations in several ways.
| To save | |
|
1. To save a presentation, click the Save Command on the Quick Access toolbar. |
| To use the Save As command | |
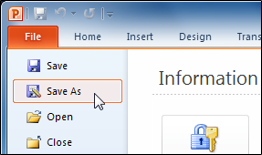
| 1. Click the File tab. 2. Select Save As. 3. The My Documents window opens.
|
 |
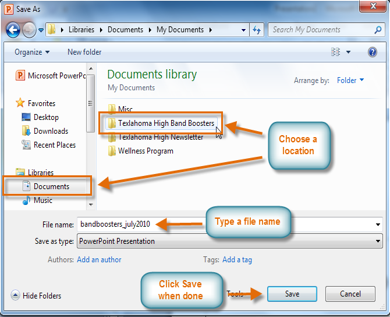 |
4. Choose a location. 5. Enter a name for the presentation. 6. Click Save when done. |
Click on the link to watch a video on "Saving a Presentation in PowerPoint 2010" or click on the video.
| To print | |
|
1. Click the File tab and select Print.
2. The Print window appears.
3. Determine and choose how you want the slides to appear on the page.
4. Select Print All Slides.
5. Select the number of copies.
6. Select a printer from the drop-down list.
7. Click the Print button. |
Click on the link to watch a video on "Printing a Presentation in PowerPoint 2010" or click on the video.
1. Click the picture to open the PowerPoint presentation, "A Slideshow about Me!"
2. On Slide 3 delete the age, hair and eye color. Insert your own age, hair and eye color. Add other bullet points to include more about you. |
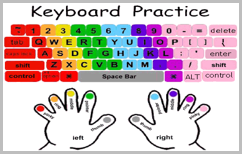
Go back to Unit 3: Keyboarding! You should practice your keyboarding skills on the next lesson after the one you stopped on the last time. Keep track of your work. Click here to download and fill out the chart. Show it to your parents and teacher, so they can see your keyboarding skill progress.

Below are additional educational resources and activities for this unit.