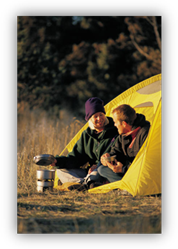
Backpacking


Unit Overview
In this unit you
will be introduced to the adventure sport of Wilderness
Backpacking or mobile camping.
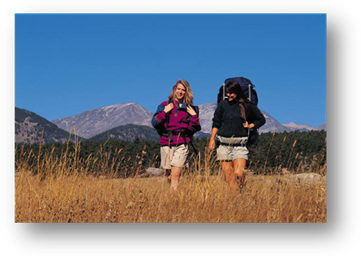
You will see that backpacking is an outdoor challenge that totally
immerses you into the gorgeous scenery of the backcountry. Backpacking is a very rewarding way to
exercise. You will also study Aeorobic Exercise.
You will also be completing another activity log for
this week.
- Open
another copy of the blank activity log. If you need
to download a new copy, you can download it as a PDF file.
- Rename
the activity log file, and save it on your computer.
- Remember
to have a parent or guardian enter his or her e-mail address at the bottom
of the form. This task should be completed by
the parent or guardian, not by the student. Doing this is the equivalent
of signing the form to verify that the student has completed the
activities listed on the activity log. The e-mail address must be valid
and belong to the parent/guardian. The teacher may contact the
parent/guardian at this e-mail address at any time. The e-mail address
will not be used for any purpose other than allowing the teacher to
contact the parent/guardian. Entering the parent/guardian e-mail address
is the equivalent of signing the form.
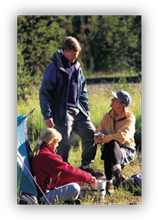
The sport of
Wilderness Backpacking
Backpacking is a
outdoor adventure activity where an individual (Backpacker) packs all of his or
her gear into a single backpack. That is where the term "Backpacking"
was developed. The sport of backpacking
combines hiking and camping in a single trip.
A backpacker hikes into the back country carrying enough supplies and
equipment to spend one or more nights in the wilderness. The backpacker must bring enough supplies and
equipment to satisfy sleeping and eating needs. The
gear must include food, water and shelter. They must also carry
emergency food and first-aid equipment and be acquainted with survival
techniques
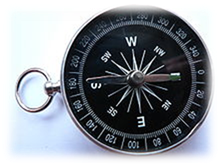
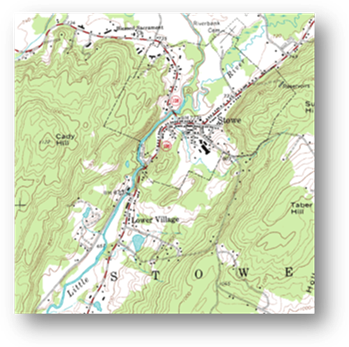
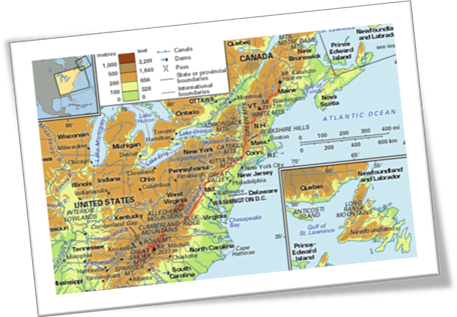
Backpackers must be
able to read topographic maps and use a compass.
A topographic map shows the features on the earth's surface in
accuracy and details appropriate to the map scale. A topographic maps allow you
to see a three-dimensional landscape on a two-dimensional surface. These maps
show the land's contours, elevations, mountains, valleys, water features,
cultural features, roads, and buildings. This contour and elevation information
distinguishes them from other maps. Another thing to remember when you look at
a topographic map, the top edge of the maps is always north. A
Compass is an instrument for determining
directions, as by means of a freely rotating magnetized needle that indicates
magnetic north.
|
|
|
|
Compass |
Topographic
map |
If a backpacking trip does not
include at least one overnight stay in the backcountry, it is called a Day Hike. Some backpacking trips can be longer than
just a couple days. A long distance
backpacking adventure could last weeks or even mouths. It is impossible for a backpacker to carry
enough food and supplies for an extended trip.
They rely on people to drop of
food and supplies to different planned drop off locations along the way. Some wilderness trails lead into or close to
an area where there are businesses that carry supplies for backpacking.
Backpacking camps
are more basic than ordinary campgrounds. In areas that experience a regular
traffic of backpackers, a hike-in camp might have a fire ring, water, outdoor toilets, a water supply and a wooden bulletin board with a map of the trail. Many hike-in camps are no more than level
patches of ground without underbrush. In very remote areas, established camps do not exist at
all, and travelers must choose appropriate camps themselves.
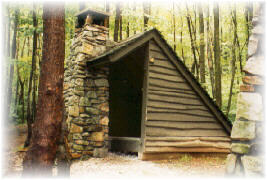
In some places,
backpackers have access to lodging that is more substantial than a tent. On
trails like the Appalachian Trail, there are established shelters that offer a
place for hikers to spend the night without needing to set up a tent. Most
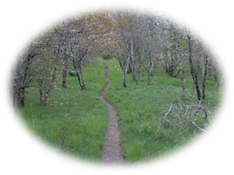
backpackers purposely try to avoid impacting on the land through which they
travel. This includes following established trails as much as possible, not removing
anything, and not leaving residue in the backcountry.
|
|
|
|
The Pocosin cabin along the trail in Shenandoah National
Park, Appalachian Trail United States |
Shelter along the Laurel Highland hiking trail Laurel
Highland Mountains, Pennsylvania |

The History of Backpacking


The initial idea of backpacking and where it originated from is not
documented. It is probably safe to say that the early prehistoric man walked in
the wilderness with a "pack" on his back containing food and other
necessary items for survival. The
history of backpacking as a recreation dates back to
the early 1900s. Originally, in the
early 20th century, backpacking was practiced in the wilderness as a means of
getting to areas inaccessible by car or by day hike. Many would say that the
history of backpacking began in 1920 with Lloyd F. Nelson’s invention of the
camping backpack. Nelson wanted to make a pack that was more comfortable. He designed his invention with a rigid pack board, which not only
gave structure to the backpack, but also made it easier to carry over long
hauls. Before Nelson’s invention, the backpack or rucksack was simply a loose canvass bag
with shoulder straps. The pack board created a division between the contents of
the bag and the carrier’s back. In addition, it distributed weight more evenly
across the shoulders. The original design
remains relatively the same with modern backpacks.
The
National Trail System
![]()


The National Scenic Trail Act of 1968 contributed greatly to the growth of backpacking and hiking as a pastime in the United States. The National Scenic Trail Act of 1968 established the National Trails System. The National Trail System created a network of scenic, historic, and recreational trails. The act helped set up a system of hiking trails that travel throughout the country. These trails provide outdoor recreation by promoting the enjoyment, appreciation, and preservation of open-air, outdoor areas. The National Trail system uses historic resources, and encourages public access and citizen involvement.

The Pacific North
West Trail The Appalachian Trail
List of National Scenic
Trails
Trail name Year established Length authorized miles
|
|
THE APPALACHIAN TRAIL
The
Appalachian National Scenic Trail,
also known as the Appalachian Trail
is a marked hiking trail in the eastern United
States extending from the state of Georgia
and running northeast to the state of Maine. It is
approximately 2,178 miles long. It was designated in the year 1968 as the
first national scenic trail. The majority of the trail is in wilderness, although some portions do traverse towns, roads, cross
rivers and transverses the Appalachian Mountains.
Short
hikes are the primary use of the footpath, but each year a few thousand
“thru-hikers” attempt to complete the entire trail, usually starting in March or April. Thru-hiking is the process
of hiking a long-distance trail
from end to end. Hiking
the trail in its entirety takes
five to seven months. Primitive shelters are located 10 to 12 miles apart.
Emma
Rowan Gatewood better known as “Grandma Gatewood” was the first woman solo
hiker that hiked the entire Appalachian Trail in 1955. Gatewood hiked the Appalachian Trail in 1955
at the age of 67, wearing “Keds” sneakers and packing only an army blanket, a raincoat,
and a plastic shower curtain. She carried these items in a homemade bag slung
over one shoulder. This made her the
first person to hike the trail three times although her final hike she
completed hiking different sections of the trail instead of a thru-hike.
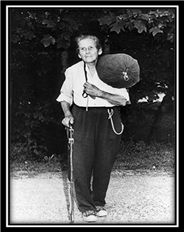
“Grandma Gatewood”
Backpacking Equipment

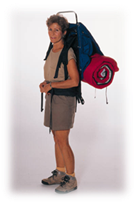
Internal frame pack External frame pack
A backback hangs
from the shoulders and is supported by a combination of straps around
shoulders, waist and hips. There are two basic types of backpacks. The External frame
pack and the Internal frame pack. The External frame pack has
the framework on the outside and they are the best choice for hiking on groomed trails and carrying lots of
weight. The External frame pack is especially good at transferring the pack
load so that the backpacker can hike in a more comfortable upright position.
The cost of an External Frame pack is about half the cost of an Internal frame
pack. External frame
packs usually have many small compartments that make organization easier.
Internal frame
packs have the framework on the inside and are more form-fitting, so they are
better for hiking rugged hiking trails that require freedom of movement and
balance. Most Internal frame packs have one huge compartment with a couple of
zippered access points. The Internal Frame pack also has a waistband to
transfer most of the weight of the pack to the hips. Many backpackers have expressed that the
Internal frame pack is more comfortable however, this type of pack tends to be
hotter on your back.
Loading A Backpack
The way to load a
pack depends on the type of trail that is going to be encountered by the
backpacker. For an easier trail that is
well groomed and is basically level, a high center of gravity is best. To achieve this, load bulky light gear like
a sleeping bag, low in the pack and stack heavier gear on top of it. For steeper terrain, a lower center of gravity
is best because it lessens the chance of falls due to a top-heavy pack. In this
case, place heavier items a little lower in the pack and closer to your back
than normal. Women may prefer this arrangement under all circumstances.
When loading a
backpack a backpacker must keep in mind the items that are needed along the
trail and the items that will only be used at the camp site. Items
that may be needed along the trail such as snacks, water, first-aid kit, and
other items need to be packed so that the backpacker has easy access to these
items as they hike. It is no fun for a
backpacker to stop on the trail and unpack their backpack to find something
they need on the trail because of poor planning.
Which type of pack
is better? It is really a personal
choice based on individual needs.
Preparing for your backpack Trip
Backpacking
requires a great deal of planning.
Backpack planning
should include:
Ø Physical conditioning and practice.
Ø Knowledge of camping and survival
skills.
Ø Proper selection of equipment with
consideration of a minimum weight that is consistent with safety and comfort.
Ø Consideration of food, water, terrain,
climate, and weather.
Ø Check map of the backpacking trip and reserve
camp site if nessary.
Ø Check the safety and condition of all
equipment.


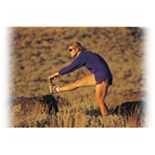
It is extremely important to be prepared physically for the trail. The best exercise to prepare for a backpacking trip is walking. Walking provides a cardiovascular workout and it also strengthens the same muscles that are used on the hike. It is best to begin by walking 30 to 45 minutes three days a week to train for a five mile hike. Then on a separate day of the week, take a longer walk and try to increase the distance each week until the walk is about two-thirds of the length of the trip. It is really important that a backpacker walks or hikes in the shoes that are to be worn on the backpacking trip. Always break in footwear before a backpacking trip. Foot pain or even a simple blister can cause big difficulties on a backpacking adventure.
Backpacking Check List

One of the most important steps to making a trip more
pleasurable is packing well. A
backpacker should take only the items and articles absolutely needed. This will
make a trip more enjoyable by lightening the load of their backpack. A backpacker has to carry
their backpack around for a long period of time so it is important that their
pack contains only those items needed for the trip. A backpacker should make a list to include everything that is needed for
the hike. When making the list
thought should be given to the basic needs for survival, food, shelter and
water. Backpacking equipment is
designed to be small in size and weight.
For example a backpacking stove
can be small enough to fit into a shirt pocket and can weight far less than a
pound. A common backpacking goal is to
have a full backpack that weights less than 30 pounds.


Your backpacking check list should
include the following:
ü Essentials
Essentials should include items like backpack,
drinking water, water bottles, matches and lighter, fire starter, knife or
multi-tool, first-aid kit, insect repellent, map of the area, compass,
flashlight with batteries or head lamp, whistle, zip lock bags, duct tape,
water filter, and hiking poles.
ü Food and cooking gear
Food and gear should include items like trail
snacks, energy bars, freeze dried meals, instant beverages, camp stove with
fuel, light weight cooking pot, eating utensils, plastic cup, and biodegradable dishwashing soap.
Clothing and outerwear should include items like a
hat, raingear, extra underwear, a change of clothes, extra hiking socks, fleece
shirt, flip flops and the most important backpacking equipment “HIKING BOOTS”. That is right! Most backpackers agree that the most
important single piece of backpacking equipment is their “HIKING BOOTS”.
It is very important to have you hiking boots broke in before your hike. The
type of clothing and outerwear depends on the weather and the season of your
backpacking trip.
ü Personal Items
Personal items should include toilet paper,
biodegradable soap, several bandanas, toothbrush/toothpaste, deodorant, small
towel, lip balm with sunscreen and other personal items that you might need for
the trip.
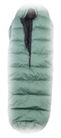
Camping gear should include a tent, sleeping bag,
sleeping pad and compressions sacks. A compression sack is a stuff sack, designed for
the storage of items like bulky sleeping bags and tents
(minus the poles and stakes).
Compression sacks are used to pack things easier in an internal frame
pack. It is equipped with a cloth lid
that is attached to the opposite sealed end of the sack by adjustable straps.
When the straps are forcibly shortened, the sack and its contents are reduced
in size.

Compression
sacks
Extras should include items like trekking poles, a
watch, cell phone, GPS device, moleskin for blisters, camera, piece of cord or
rope, binoculars, weather radio, deck of cards, money, small note book with
pencil and other item that are deemed necessary. The best plan is to choose
wisely because everything that is taken on the trail must be carried out of the
trail.
Safety on the trail


Important Safety Tips
Ø Take your
time and plan your trip well. Become familiar with the area you are going to
hiking and how you are going to get there.
Take in mind how difficult is your hike.
Where are you going to obtain your water and where are you going to
camp.
Ø Leave a
full itinerary with someone you can rely on. Include all known dates and times. It is extremely important to sign all trail registers.
Ø Never
travel alone.
Ø Drink
plenty of water & eat high-energy food. Carry an extra meal or two in case
you get lost.
Ø If you
think you are lost, STOP. Try to figure
out where you are by looking for landmarks, using the position of the sun for
direction. If you have a cell phone with a signal, use the GPS device that is
standard on most models, or call the ranger station for help. Check your
compass and your trail map. Do not start traveling again until you are sure
where you are and where you need to be going.
Ø If you
really are lost, STAY PUT. Put out a distress signal (mirror, yelling, whistle,
smoke). Three of anything (shouts, whistles, smoke signals, etc.) signifies an
emergency. If you left your itinerary with someone, people will be looking for
you within 24 hours after you fail to show up.
Ø Sudden
storms are common in the mountains. During lightning storms stay off high, open
ground and away from isolated trees. Find shelter among small trees in low
areas or lie on the ground. Carry a tarp or ground cloth to make shelter from
the rain.
Ø Make camp
well before dark or at the first sign of a storm.
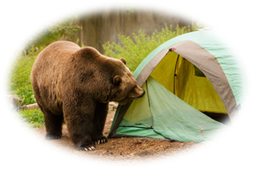
Ø Be alert.
Watch out for rattlesnakes, poison oak, sudden storms, bears & other
hazards.
When traveling in black bear country, remember
these things:
a.
Most black bears will leave before you are even
aware of them.
b.
Make noise on the trail.
c.
If you happen to encounter a bear on the trail, stop
and face it. Do not RUN. The bear
is usually more afraid of you than you are of it. Make
sure the bear has an escape route and then begin to yell and wave your arms.
You want to appear like you are a threat to the bear. Slowly back away from the
animal. If bold, the bear may charge. Greater than 90% of all charges are
bluffs but you want to be prepared. Your last possible course of action is to
physically attack the bear with anything you have in your presence.
d.
Be alert when on the trail. Chances are very slim
that you will ever come face to face with a bear and your best defense is to stay
calm.
The goods new is that in North
America more people are injured by spiders, snakes, dogs, bees/wasps, and
lightning than bear attacks.
Aerobic Exercise
Aerobic exercises help increase your
cardio respiratory fitness. This is also called aerobic endurance or aerobic
fitness. Cardio
respiratory endurance is the ability of the body's circulatory
and respiratory systems to supply fuel and oxygen during sustained physical
activity that lasts longer than a few minutes.
Aerobic activity uses the large muscles in your arms and legs, increases
your heart rate, and makes you breathe harder. Aerobic exercises, such as
walking, biking, and jogging, swimming are good for your cardiovascular system
because they strengthen your heart, lower your blood pressure, and improve your
circulation. And there's no substitute for aerobic activity when it comes to
calorie burning and fat burning.
What is aerobic exercise?
Aerobic exercise gets the heart
working to pump blood through the body more quickly and with more force than
normal. As blood is pumped faster, it
must be oxygenated more quickly, which quickens respiration. Aerobic exercise is any activity that you can sustain for more than just a
few minutes while your heart, lungs, and muscles work overtime. Aerobic exercise strengthens your heart and
helps you maintain a healthy cholesterol level. Cholesterol is a fatty substance that is an important
part of the outer lining of cells in the body of animals. Cholesterol is also
found in the blood circulation of humans. The cholesterol in a person's blood
originates from two major sources, dietary intake and liver production. That means some cholesterol is found in
certain foods, and some cholesterol is produced by the liver. Too much bad
cholesterol is not good for your heart.
So in other words aerobic activity helps keep your heart healthy.

Experts recommend that you work at a
moderate level of intensity, at least when you first begin an aerobic exercise
program. That means you shouldn’t overdo
when you first start to participate in an aerobic activity. There are two ways to tell whether you're at
the moderate level. The simplest is the "talk test". If you can still carry on a conversation and
the activity feels somewhat difficult, then you're probably working at the
right pace. If it's too difficult to talk and you find yourself panting, slow
down. That indicates that you're pushing yourself too hard. The second way is,
if you're breathing easy and can belt out a tune while you're working out, you
need to pick up the pace a bit to burn fat.
Whether you walk around your neighborhood at home, at the mall, or around the
track at a nearby school, walking gets you moving without any fuss. All you
need are some good sport shoes, loose clothing, and a water bottle. Increasing
your pace and pumping your arms as you walk boosts the intensity and the amount
of calories expended without putting in any additional time. If the weather
doesn’t cooperate, have a backup plan, such as walking in an enclosed shopping
mall. Many people fit aerobic activity into their mornings before work, during
their lunch hour, or after dinner. It's up to you, and your plan can be
flexible.
Tips for Walking
Here are some great tips to follow
when walking for exercise.
® Walk naturally. Your body is unique and it has its own form
and style of walking.
® Keep your spine straight and hold your head high as you
walk. Your weight should shift
naturally from one leg to another.
® Keep your wrist,
hips, knees, and ankles relaxed. Let
your arms hang loosely from your sides and let them swing naturally opposite
your leg stride. That means you left arm
swings forward as the right foot steps forward and vice versa for the next
stride.
® When walking the
foot should strike the ground at the heal part of the foot first. Then transfer
your weight forward along the outer portion of your foot, then pushing off with
your toes. This should be like a rolling motion. Avoid flat-footed walking or walking on the
front part of the foot only. This could
cause foot, leg and back problem.
® As you begin your walking program, don't worry about the length of your stride. Just do whatever is comfortable. As you increase your speed, your stride length will increase as well.
® Breathe normal as you walk using both your nose and your mouth. The faster the pace the more air you will need.


Here's a list of activities that
provide a good aerobic workout:
® Aerobics
® Badminton
® Basketball
® Biking
® Dancing (jazz,
hip-hop, modern, swing)
® Golf (carrying
clubs)
® Hiking
® Mall walking
(3-4 mph)
® Running or
jogging
® Skiing-
especially cross county (Nordic)
® Stair climbing
® Spinning
® Stationary
cycling
® Swimming
® Walking
® Water aerobics
School
Sports That Are Aerobic
® Baseball (run
the bases)
® Basketball
® Cheerleading
(running, jumping, dancing)
® Color guard
(flag team)
® Cross country
® Dance team
® Drill team
® Field hockey
® Football
® Golf team (carry
clubs)
® Lacrosse
® Rowing
® Soccer
® Softball (run
the bases)
® Swimming
® Tennis
® Track and field
® Wrestling
Select the Activities You
Enjoy!!!!!!!!